Welcome to the Mines. This area takes a turn from the previous areas, rather than fighting monsters you get to kill robots instead. Watch out for hidden traps, they're quite frequent in here, so having lots of Trap Vision with you is a good idea. The Mines are shorter than the Caves, but once again the enemies hit harder, so you'll need to take care to not get pummeled. The floors have a rather polished look and the electric patterns on them change periodically. Since the robots are not organic, they cannot be paralyzed by weapons like the other enemies, however they can be shocked if you use lightning magic or a lightning special attack on your weapons. Once shocked, the bot will short circuit for several seconds during which it can't move, so try to kill it before the effect wears off.
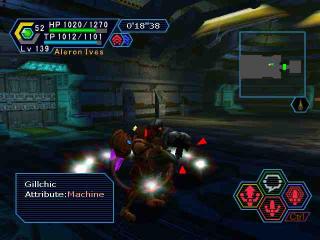
Gilchic
Gillchics are the main enemy in the Mines. They're a simple walking robot, and like to attack in groups. They swipe at you with their arms rather quickly so it's best to not get surrounded by them. Although they hit hard, they are very easy to knock down, so keep that in mind. If you get too far away from them, they launch purple lasers from their hands, which hurt quite a bit, so try to hit them down before they can launch an attack. Their swipes can cause the Slow effect, so keeping Anti/Sol Atomizer handy is a good idea.
Found in: Mine 1, Mine 2
Weak to: Lightning, Light
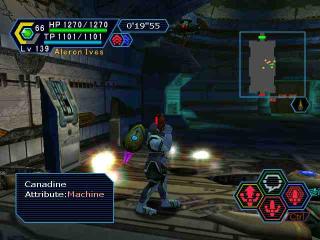
Canadine
Canadines are small, flying robots. Some will immediately take off and try to zap you with zonde, so you must move to the side to get out of range of their targeting lasers before they zap you. Others will move along close to the floor, and close in around you, at which point they will attack you with sparks. They may not sound dangerous, but they can pack quite a punch, especially when they attack in a swarm.
Found in:Mine 1, Mine 2
Weak to: Ice
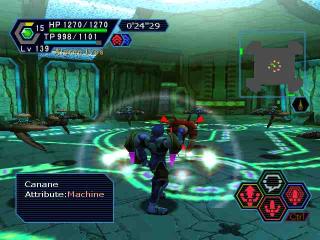
Canane
Cananes are only found in Canadine circles, and they always appear in the center. Cananes are leaders of these circles, they don't have any special abilities that Canadines don't have, but if you kill them, the Canadines around them will go berserk. All the Canadines formerly in the circle will sound an alarm and rapidly spin around and home in on the nearest person. After a few seconds, they will all self destruct, which can cause quite a bit of damage if multiple Canadines blow up near to one person. It's best to kill several Canadines before attacking the Canane, but if you destroy too many Canadines before going after the Canane, all of the remaining Canadines and the Canane will disappear.
Found in: Mine 1, Mine 2
Weak to: Fire
Sinow Beat
Sinow Beats are much more agressive than the other Mines enemies, they hit repeatedly and move faster than the other robots do. Sinows appear in rooms clinging upside down to the ceiling like bats, and when you get close to them they drop down to the floor and start chasing you. If you get far enough away, they'll jump and pounce at you, then they will swing their arms at you 4 times, and jump back. These swipes can cause the Confusion effect, so you hopefully still have Anti ready. Regular Sinows at this point will simply jump forward at you again and continue this pattern, but there are some special Sinows that have the ability to clone themselves. Once these Sinows jump back, they put their arms together and create a slew of clones that spread around the room. While these clones aren't real Sinows and will disappear if you hit them once, until you do they will all attack you like real Sinows do. There is a way to distinguish between fake and real Sinows; the real Sinow Beat has red markings on its shoulders, the clones have white markings.
Found in: Mine 1, Mine 2
Weak to: Fire, Lightning, Light
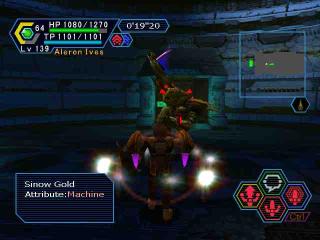
Sinow Gold
Sinow Gold attacks in the exact same way as the Sinow Beat, but they have one distinct difference: they can cast Resta on themselves and all nearby enemies. Once they have swiped at you 4 times and jump back, they put their arms together and cast Resta on any enemy close to them. Once they do this, they'll resume attacking. They have one distinct disadvantage though as well; once they try to heal you can keep them from attacking indefinitely until they die. As soon as they jump back and try to heal, if you attack them, they will try to heal again, and then you can simply do another 3 hit combo, and during the period while your character recoils and prepares for another combo, they will try to heal again. You can simply continue striking and they will never have enough time to heal and resume attacking. Even if they do manage to use Resta, if you attack soon enough during this period, they will still be caught in this cycle, just be careful you don't cause them to use Resta repeatedly. ;)
Found in: Mine 1, Mine 2
Weak to: Fire
Mine 2
Mine 2 is darker and more sinister than Mine 1, and introduces a few new enemies.
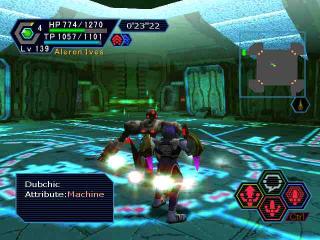
Dubchic
Dubchics look a lot like Gillchics, but they are lighter in colour. Unfortunately, they are a lot more annoying than their Mine 1 counterparts. They happen to have more than one life. When you knock them down and scatter their parts, instead of dying, they generate a field that pulls their scattered parts back together, after which they get back up and start attacking again. If you want to really kill a Dubchic, you must go through this process about 5 times... but there is a special way to kill them, in the form of the Dubswitch.
Found in: Mine 2
Weak to: Lightning, Light
Dubswitch
Dubswitches in and of themselves aren't really enemies, however they are controllers for Dubchics. If you kill the Dubswitch, all the Dubchics in the room will self destruct automatically and you won't have to spend time killing the Dubchics the long way. Dubswitches hover high up near the ceiling when Dubchics first spawn. It is possible to destroy the Dubswitch at the point, but only with a gun. To be able to use magic or short range weapons on the switch, you must first kill at least 1 Dubchic. (Causing the Dubchic to have to reconstruct itself and pull its parts back together.) Once at least 1 Dubchic has been felled, the Dubswitch will drop down and open up, and you can kill it at your leisure.
Found in: Mine 2
Weak to: Lightning, Light (others?)
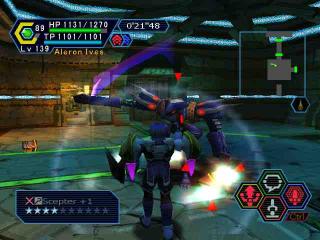
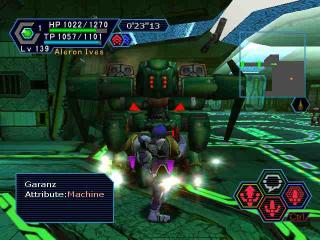
Garanz
Garanz are the most powerful enemy in the Mines. They are similar to giant rolling tanks. They will move up to you and then spurt several homing missles in your direction. You must run far away before the missles will self destruct, or you'll get hit. Garanz are covered by many layers of protective armour, so you must hack away at it with your weapons. However, the more layers of armour that you break off of the Garanz, the more missles it will shoot at you! Each time you break off a layer, it will increase the number of missles fired in each volley. If you attempt to kill the Garanz head on, you'll end up taking quite a bit of damage. Since Garanz are rather slow moving, it is possible to use their large size against them. If you run in a tight circle around a Garanz, its homing missles will end up running into the Garanz itself because of its large mass, and the giant robot will end up killing itself with its own missles. Be careful, the longer you run around it and the more layers of armour the Garanz knocks off of its own body, the more missles are fired just as if you try to kill it yourself, so if you get stuck against and obstacle while you run, you'll get pummeled by a mass of missles. If you run around the room erratically, the missles can be used to hit other enemies, too lol. =P
Found in: Mine 2
Weak to: Nothing that I can think of... =/
Well, that concludes the enemies in the Mines! Now, prepare yourself for the boss, Vol Opt.